How to Paint the Exterior of a House: Clare’s Ultimate Guide
Follow these steps for the best-dressed house on the block.

We know a person should never judge a book by its cover, but let’s be honest: a fresh coat of paint can make a huge difference to your home’s exterior. At Clare, we firmly believe that your brightest, boldest self knows no bounds, so why not show off your style with a striking front door color, a fresh trim upgrade or a siding shade that'll make your house the star of the neighborhood? (Since your home’s exterior is the first thing guests will see, it deserves to stand out just as much as your great indoors.) Curb appeal aside, a fresh coat of paint can increase your home’s value, making this one project that will pay for itself in years to come.
Learning how to paint the exterior of a house can be time-consuming and labor-intensive, which is why most homeowners enlist a professional to take on the legwork. But, what if you want to tackle this project on your own? We’re cheering you on and here to help. Here’s everything you need to know to prep and prime your space, plus our top tips on how to paint the exterior of a house. Now all you need to do is pick out a color that will make your property shine.
Prep:
With the right preparation, your outside paint job can last for years to come. So, if you’re going to put a lot of time and effort into painting your home, shouldn’t you get it right the first time? Though it might seem like prepping your home requires a lot of time and energy, taking those small steps upfront will ensure your paint job is pristine and peel-proof for a long time. (You know, just like you hired a pro!)
Gather Your Tools
Believe it or not, there’s a lot more than goes into an excellent paint job than a gallon (or two) of high-quality paint. The right tools can make your paint glide onto your surface with ease and prevent any unsightly streaks. While the exact tools you’ll need will depend on the size and scope of your project, a great applicator will be the hero of any exterior paint job. So, which applicator is best for your project? We’re so glad you asked.
Trim: Since trims, shutters, and decorative touches require a lot of control and attention to detail, you’ll want to use a smaller, angled paint brush. Fortunately, our 2” Angle Paint Brush has very soft, flexible filaments to keep your brush marks to a minimum.
Front Door: Our Mini Paint Kit is the perfect choice for painting your front door. The power combo of the Mini Roller Frame and Microfiber Roller combo offers plenty of coverage, but still allows for plenty of control when painting a relatively small surface area. Of course, no two doors are created equal. If your front door has smaller decorative details or hard-to-paint corners, you might want to bust out your angled paint brush again.
Siding: If you have a small, single story home or are a beginner who wants to play it safe, a quality paint roller with an extension pole is the way to go. But keep in mind, painting your home siding with a roller will require a lot of time and muscle. If you’re looking to save time, a paint sprayer will hands-down be the most efficient way to get the job done. Not only does a paint sprayer give you lots of coverage, but it also increases your reach so you can cover more surface area quickly. Fortunately, you can easily rent a paint sprayer from a big-box hardware store.
Clean Your Exterior
There’s a reason why we always recommend painting a dry, clean surface. Not only will painting over dirty walls make it harder for your paint to stick, but you might wind up with an uneven texture or coat that cracks and peels over time. (Um, no thank you.) Unlike your interior—which is protected by doors and windows—your home’s exterior is going toe-to-toe with the elements every single day. You’d be amazed—and maybe a little grossed out—by how much dirt, pollen, mildew is on your home’s exterior, making a thorough clean even more important.
- Get your home squeaky clean with the help of a pressure or power washer. (The high pressure will blast away grit and grime in no time.) Though you can buy or rent a pressure washer from your big box hardware store, a garden hose is a low-cost way to clean your facade.
- Need to give your cleanse an extra oomph? Consider applying a detergent to really make your home shine.You can easily pick up a power washer-friendly solution to cut through dirt and grime.
- Since you just covered your house in water, you need to give it some time to dry so your paint can adhere properly. (After all, how could your paint possibly dry if your home isn’t even dry?) We recommend waiting at least 24 hours before you start to paint.
Protect Your Property
No matter how careful you are, painting can be a messy endeavor. Just as you would throw a drop cloth on your precious hardwood floors, it’s important to protect the area around your home from paint splatter (After all, nobody wants to see a bright blue droplet on their pachysandra.) But, with the help of these easy trips, your property will look good before and after your paint job.
- Cover grass, hardscaping and surrounding foliage with Drop Cloth. Though your walkways and driveway can be covered with any drop cloth, you’ll want to make sure the layer over your greens is plant-friendly. (Plastic drop cloths can get too hot and wreak havoc on your greens.)
- If you have shrubs surrounding your home’s exterior, tie them up with yarn or trim them a few feet. That way, you’ll be able to get in between your shrubs and siding.
- Don’t forget to cover pipes and air conditioning units, too! Fortunately, it can be as easy as placing some newspaper on top and securing it with a few strips of tape.
- In a perfect world, you’ll remove accents like light fixtures and doorbells from your home’s exterior. However, if you’re unable to physically remove anything, make sure you cover them in tape.
- Have furniture on your patio or porch? Keep your pieces in tip-top condition by schooching them far away from your paint zone.
- Last but not least, keep your view intact by taping plastic over your windows. (After all, nobody wants to look out a window that’s covered in paint splatter!)
Repair Your Exterior
Since painting your exterior is a labor-intensive, time-consuming project, you want to make sure your home’s bones are in good shape before you get started. Think about it this way: If you’re painting wooden siding that’s partially rotting, you’ll probably have to do the whole thing over again in a few years. By giving your exterior surfaces a once-over and replacing any problem areas now, you’ll save yourself the headache later.
- Before you start painting, take a close look at your siding. If you spot any rotted wooden boards, you’ll want to replace them ASAP. (Though scraping away the rotted area with a knife and adding some wood filler is a budget-friendly option, keep in mind that it’s just a temporary fix.)
- Have wood with small gaps or cracks? Seal up any smaller blemishes with caulk. This way, you’ll have a smooth, leak-free surface to layer on the paint. Though caulk should typically be replaced every few years, you want to select a high quality elastomeric or paintable silicone caulk that’s compatible with your home’s exterior material and can hold its own against your area’s temperature and humidity.
- If the exterior surface you’re painting is smooth, lightly sanding first will help you get better paint adhesion—especially if you’re working with a glossier surface. Grab a slab of fine grit sandpaper and lightly sand your surface to prep the surface for painting. Anyone who needs some extra height should invest in a pole sander, which has an extended handle that makes it possible to prep those hard-to-reach areas. If your surface is highly textured (such as brick or stucco) you can skip this step.
Getting Ready to Paint
It’s almost time for the fun to begin! Before you crack open your can, give the mixture a little stir, and pour all of that colorful goodness into your paint tray, you need to make sure you’re working with peak painting conditions. Though our exterior paint offers premium protection from the elements, including UV rays, frost, salt, moisture, and mildew, the right weather will ensure your paint goes on and dries properly.
- When it comes to painting your home’s exterior, you’re looking for the Goldilocks of temperature. Extreme temperatures—a.k.a. too hot or too cold—can result in poor paint adhesion. Check your local forecast and plan your paint session for when you have a few consecutive days of mild weather.
- Speaking of extreme conditions, fresh paint and humid days do not mix. Since the moisture will make the paint dry a lot slower, stick to drier days. (And, yes, you guessed it: rain is a no go, too.) On the flipside, harsh winds will make the paint dry too fast, resulting in lat marks.
- Since air is flowing freely outside, you won’t have to worry about adding even more ventilation to your setup. But, if you’re still a little worried about those toxic fumes, you can rest easy knowing Clare’s paints are ultra-low in VOCs.
Painting:
With so much ground to cover, painting a home’s exterior can feel a tad overwhelming. Don’t worry, the process is a lot easier when broken down into a few, simple steps. (You got this!)
Prime Your Surface
Unless your home is in pristine condition—a.k.a. it was just built—you’ll want to cover your exterior in primer first for the most professional-looking end result. While primer can offer excellent color retention and a clean, uniform-looking finish, it’s a must if you’re going from a higher sheen to a lower sheen finish or switching from a darker shade to a lighter one. (Psst…primer is also non-negotiable if you’re working with surfaces that are unfinished, porous, or patched-up.)
Our fast-drying Interior/Exterior Primer can work on a range of surfaces, making it the foundation for a flawless paint job. That said, there might be some scenarios where you might need to pick up a speciality primer, so we recommend doing an extra bit of research first.
Painting Your Trim
Your trim is typically a small surface area compared to your home’s siding, but it’s definitely the more tedious part to paint. If you’re using a roller to paint your siding, we recommend tackling your trim first. (Once you complete this part, the rest will be a breeze.)
However, you might consider flipping the order if you’re using a paint sprayer. That way, you won’t have to tape up your trim and risk messing up your fresh coat.
- Before you paint your trim, be sure to mask the surrounding area with our Painter’s Washi Tape. That way, you won’t have to worry about accidentally painting your siding.
- Since your trim is one of the smaller areas of your home’s facade, use our 2” Angle Trim Paint Brush. If your trim has a grain, you’ll want to paint in the direction of the grain. Working with a more porous surface? You’lll want to paint in two directions so you’ll have full coverage and on the surface
- Wait 4 to 6 hours before applying that second coat. Once your two coats are on, wait 1 to 2 hours for your trim to be dry to the touch.
Painting Your Shutters
Looking for something to do between trim coats? Now’s a great time to paint your shutters if you have ‘em. (We love a good multipurpose moment!) Since painting each individual slat requires a bit more focus and precision, remove your shutters from your home’s siding and place them on your drop cloth.
- Similar to your trim, you should paint your wooden structures in the direction of the grain. Meanwhile, porous structures should get that two-way treatment for ultimate coverage.
- Wait 4 to 6 hours before applying that second coat. Once your two coats are on, wait 1 to 2 hours for your shutters to be dry to the touch. (Our advice? Wait until everything’s painted before reattaching your shutters.)
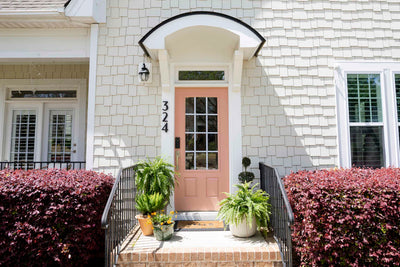
Painting Your Front Door
Not to play favorites, but we’re massive fans of upgrading your front door with an eye-catching color. Equal parts easy and eye-catching, a front door is a great entry point for anyone who wants to paint their home’s exterior, but is a little nervous about tackling a huge DIY project. And, thanks to these helpful pointers, you’ll be able to take on this area with ease.
- Does your front door have window panes? A fancy knocker? Mask your front door’s decorative features with painter’s tape. (By the way, now’s a good time to remove your door’s weather stripping. That way, you can paint freely without worrying about getting your stripping messy.)
- In order to get the best coverage possible, leave the door open.
- Add paint to your paint tray and load up your roller with plenty of pigment. Your roller is properly loaded when it’s saturated to its core, but not dripping paint.
- Wait 4 to 6 hours before applying that second coat. Once your two coats are on, wait 1 to 2 hours for your door to be dry to the touch. If you want to err on the side of caution, wait a little longer before reinstalling your weather stripping.
Painting Your Exterior’s Siding
Finally, the moment you’ve been waiting for: it’s time to paint your home’s siding. Before you get started, mask your already-painted trim and protect all the hard work you’ve already done on your home’s exterior. You can use a paint roller, but a paint sprayer may be an easier, more efficient, and quicker way to get the job done if you have a large project scope. Though using a paint sprayer requires a bit of a learning curve—you can’t just point and spray—the results are so worth it. While we recommend following your manufacturer’s instructions, here are a few pointers to make the process a lot easier.
- Before you get started, pick up an extra-long extension cord so you can cover as much ground as possible. Another must-have accessory? A long hose attachment, which will offer plenty of reach for those higher floors.
- Different sprayers have different tips, which control the coverage and overall spray. Larger tips might give you more coverage, but they can be a little tricky to control. If you’re a beginner, we recommend sticking with a 510 tip size which outputs a 10 inch fan of paint.
- Have a home with multiple floors? Start with your top story and work your way down to the ground floor. When painting your home’s different stories, you’ll always want to work from the top of the floor and work your way down, slightly overlapping each stroke. (That way, you can keep drips and streaks to a minimum.)
- Speaking of streaks, you always want to paint each side of your house from left to right, end to end. Starting and stopping in the middle of your siding will create awkward lines called stop marks that will show up when dry.
- How much paint you’ll need to give your home’s siding will depend on the material. For example, brick tends to be more porous than wood and might require double the paint to complete the job. As a general rule of thumb, materials with visible openings or holes are typically considered porous.
- Wait 4 to 6 hours before applying that second coat. Once your two coats are on, wait 1 to 2 hours for your door to be dry to the touch.
Cleaning Up:
Now that the painting is done, it’s time to clean up your work zone. But, just remember to clean and store your brushes and rollers with care. After all, high-quality tools are built to last after one paint job.
Removing Tape
Once your coats are dry to the touch, gently remove your tape at a 45-degree angle.
Ready to give your home some major curb appeal? There’s nothing to it but to do it! With the right tips and tricks, we know your exterior will be in good hands.
Tags:
We make paint shopping simple with curated colors, zero VOC paint and everything you need to create a home you love, delivered.