How to Paint a Front Door
Give your grand entrance the glow-up it deserves.

One of the easiest ways to elevate your home’s exterior is to freshen up your front door with a new coat of paint. It’s a small project with major impact and, according to real estate experts, a fresh front door color can even boost your home’s value! The best part? A front door makeover is a budget-friendly project that you can totally do yourself — all it takes is a free weekend and a little know-how. Learning how to paint your front door is totally worth the effort and it’s guaranteed to instantly upgrade your home’s curb appeal. If you find the idea of painting your front door a little intimidating, don’t sweat it: Read our step-by-step guide for how to paint your front door and you can tackle this project like a pro. 
Step One: Find Your Perfect Exterior Paint Color
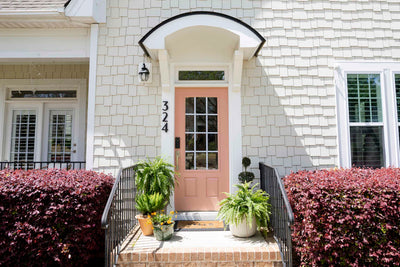
Your front door is the perfect spot to introduce a splash of color. If you’re looking to make a bold statement try a happy yellow hue like Good as Gold, or any of our Sunset Shades to create a cheery, welcoming vibe. Want a more classic combo? Opt for a sophisticated sage or an enduring blue – perfect for pairing with a neutral facade color such as a timeless off-white or refined greige. It’s also important to choose the right paint finish. We recommend our Subtle-Semigloss Exterior Trim Paint which offers a soft, radiant sheen that’s perfect for high-touch surfaces like front doors, fences, shutters, gutters and more. A semigloss paint offers extreme durability plus creates a beautiful architectural contrast when paired with a more muted eggshell finish on your exterior siding.

Step Two: Plan Ahead
Before embarking on this project you’ll first want to ensure the temperature is optimal for exterior painting. Goldilocks weather — where the temperature and conditions are just right — is most ideal. You’ll want to avoid painting when the weather is extreme. If it’s too hot, too cold, too humid or too windy, you may not achieve optimal results. Spring, early summer and early fall when the weather is generally clear and mild is a great time to tackle an exterior project. You also want to start as early in the day as possible, so you have enough time to conquer each step in the right order and allow your paint and primer to dry thoroughly between coats.
Step Three: Remove Your Door From its Hinges
If you’re pressed for time or aren’t able to leave the door off the hinges overnight, you can leave your door on its hinges and paint it in its place. But, since we’re all about helping you paint like a pro, we recommend removing your door from its hinges. This will not only help you reduce any drips and imperfections, it also helps you achieve the most even application. Before starting you’ll need to set up a working surface. A folding table or pair of sawhorses should do the trick. If your door is heavy you’ll also want to enlist a helper. Start by using a flathead screwdriver or chisel to loosen the hinge pins apart from the door hinge. With your helper holding the door, pull out the hinge pins then carefully remove your door from the door jamb, carry it over to your work surface and lay it flat. If you’re painting your door the right way, you’ll want to allow your paint to cure for at least 24 hours before re-attaching hardware which means you’ll also need to plan ahead for how you’ll secure your door opening in the meantime. If you have a storm door with a lock, this makes it easy. But you may need to board up your doorway with plywood for security, or at least cover the opening using tape and tarp to protect your home from the elements.
Step Four: Prep Like a Pro
Before you crack open a paint can, you’ll want to protect your working area and properly prep your painting surface. Lay down a drop cloth to protect the floors. Start your door prep by removing any hardware, such as door knobs and knockers. Be sure to also remove any weather stripping; and use painter’s tape to carefully tape off any areas you don’t want painted or that can’t easily be removed, such as glass panels or peepholes. 
Properly preparing your door's surface lays the foundation for a seamless paint application and long-lasting finish. Clean the door with a mild soap and water solution to remove any dirt, grime, or residue. If your door has any cracks or peeling paint, strip away any loose paint and use paintable caulk or wood filler to fill in any cracks. Let the caulk or wood filler dry, then sand down. Use a coarse grit sandpaper to remove any major imperfections, then finish with a finer grit sandpaper to smooth out your surface before you prime. This also roughens up the surface, creating a better adhesion for the primer and paint. Wipe away any dust or debris with a tack cloth before moving on to the next step. Be sure to wear a dust mask whenever you’re sanding.

Step Five: Prime Your Door
It’s always in your best interest to prime before painting. Not only can primer help retain color–especially if you’re going from a high-sheen to a lower-sheen finish–but it also helps conceal imperfections and creates a smooth base for a professional, uniform finish. (Shameless plug: Our Interior/Exterior Primer works on a variety of surfaces, making it your secret weapon for your on-point paint job.) Apply your primer using a high-quality paint roller, plus a brush to get into the corners, curves and edges. One generous coat should suffice, but if you’re painting an unfinished wood door, always use two coats since unfinished wood is more porous
 Step Six: How to Paint Your Front Door
Now, it’s time to get painting! Pour your paint into a tray and load your roller evenly using the tray’s ribbed area to remove excess paint. We recommend using our Mini Roller, which has a microfiber material with ⅜-inch nap, perfect for achieving a super smooth finish on a front door. Your roller should be saturated but not dripping paint. For a pro-like paint job, start from the top of your door and roll your way down. (If you want to fine tune your door’s edge or take on some decorative carvings, our 2-Inch Angled Brush will get the job done in style.) Let each side try thoroughly before flipping it over to paint the opposite side. Wait 4 to 6 hours before you apply your second coat.

Step Seven: Reinstall the Door and Hardware
After your paint has dried completely, allow it to cure for at least 24 hours before reinstalling your hardware. Grab your helper to help reposition your door in place, aligning the hinges together and reinstalling the hinge pins. Lastly, admire your handiwork and let the compliments from the neighbor start rolling in!Need more color inspo for your front door refresh? Make a grand entrance with these front door paint color ideas.
Tags:
We make paint shopping simple with curated colors, zero VOC paint and everything you need to create a home you love, delivered.